This website uses cookies so that we can provide you with the best user experience possible. Cookie information is stored in your browser and performs functions such as recognising you when you return to our website and helping our team to understand which sections of the website you find most interesting and useful.
Aug
With the many publicised cases of laptop and data theft that have been in the news lately, many people are beginning to think seriously about how to protect the data they have on their laptops. You may simply have private documents, pictures and passwords stored on your laptop or you may carry important, confidential information that really needs to be protected. One of the ways of doing this is to use the bitlocker full-drive encryption system which is included in some of the upmarket versions of windows.
Bitlocker is a feature that comes with the Enterprise and Ultimate editions of Windows Vista and Windows 7. If you have one of the other editions of windows, you can upgrade by buying a “Windows Anytime” upgrade for Ireland or the UK. Bitlocker can be configured in quite a few ways but the easiest and most common is where the laptop concerned contains a TPM (Trusted Platform Module) which is a chip that supports encryption. That is what I will demonstrate in this blog.
Finding out if you have a Trusted Platform Module (TPM)
The first thing you need to do is establish if you have a TPM module. You can do this by checking in your device manager.
Log onto your machine using an account that has Local Administrator priveledges. If your computer is a business machine which is part of a domain, you may need to ask your domain administrator for access.
Click on the start button, right click on “Computer” and then click on “Manage” to open the Computer Management window.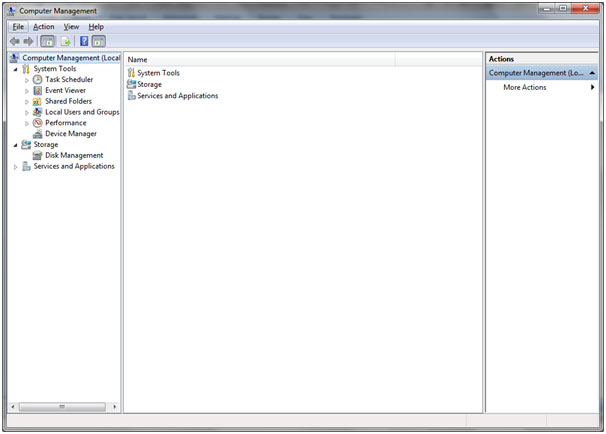
Click on Device Manager to access the device manager. Then click on “Security Devices” in the right pane to reveal your TPM. If it’s not there then you either don’t have one, or it is turned off in BIOS and you need to turn it on.

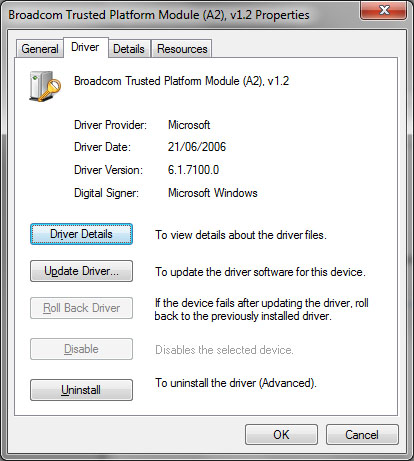
While you’re there, right click on the TPM device and click on the driver tab to ensure you have the correct driver. The name of this has changed in Windows 7 (at least on my machine). The important thing is that you’re running v1.2 of the TPM driver.
Preparing your TPM
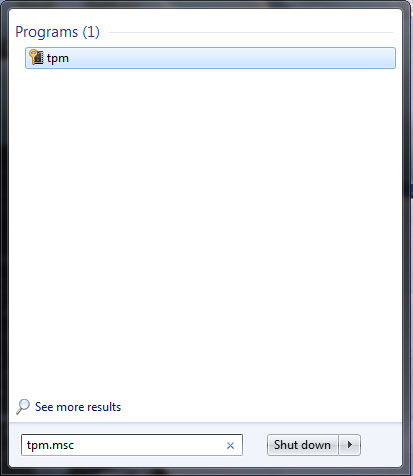
The first thing you need to do is to prepare your TPM. Click on your Start button and type tpm.msc as shown below.
This will open the TPM management console as shown below.
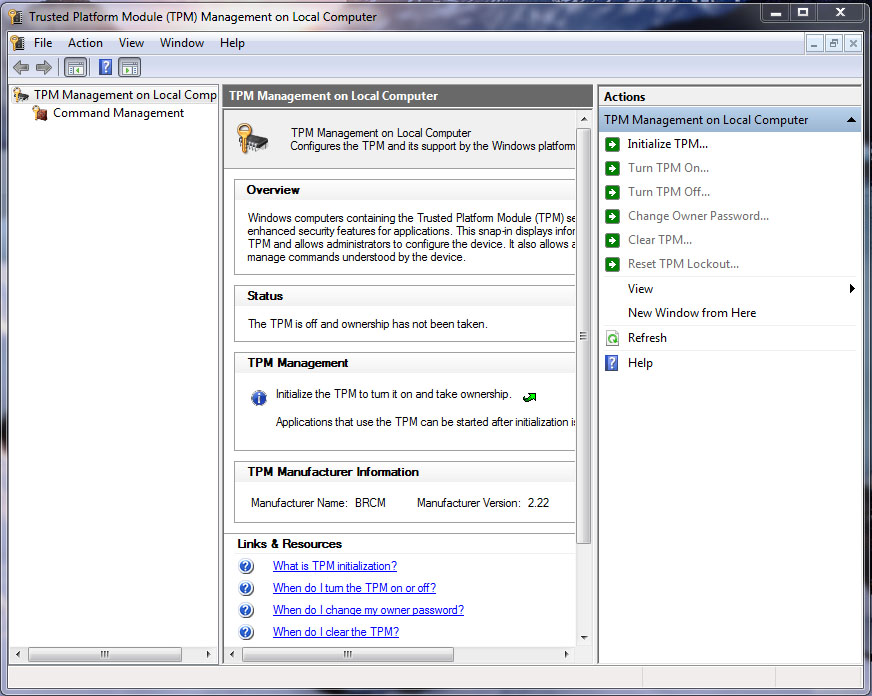
Click on “Initialise TPM” to start the process.
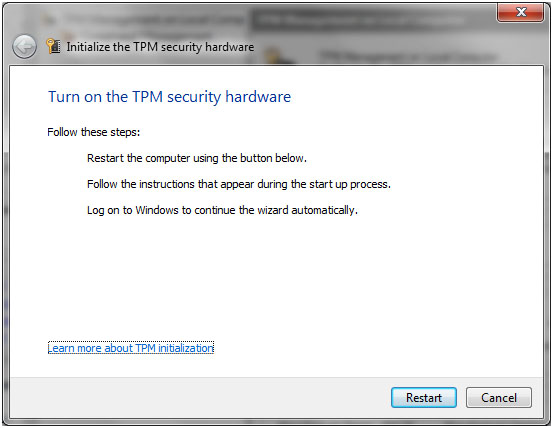
Click restart to restart your machine.
When the machine reboots, a BIOS screen will ask you to confirm the modification. Once you’ve agreed, windows will restart and ask you to create a password.
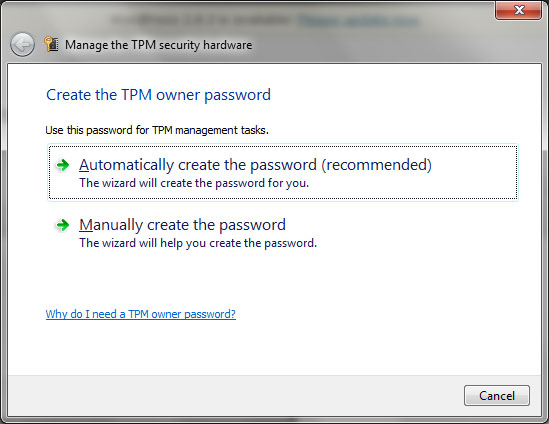
Click “Automatically create the password (recommended)”. You’ll then see your password in the next window. I’ve blurred out the one I generated
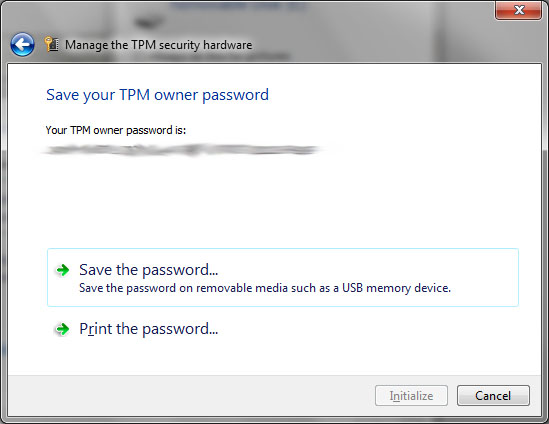
Save the file to a USB key as shown below.
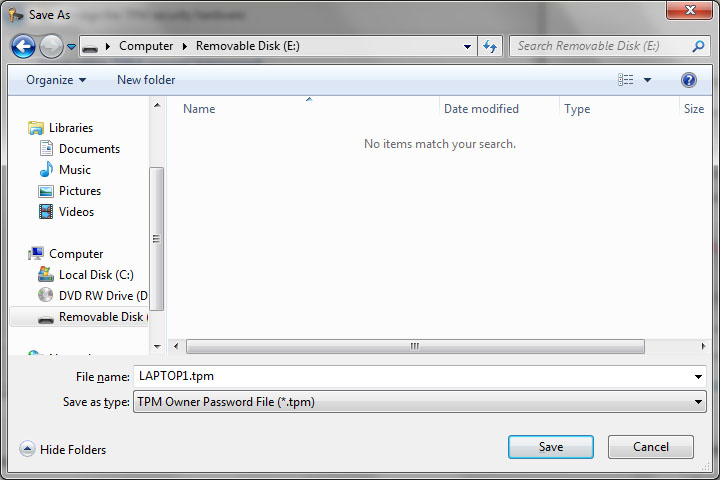
Label the USB key carefully and put it in a safe place. You will need it if anything goes wrong with bitlocker in the future.
Back on the Save TPM Owner windows above, click “Initialize”
The TPM will be initialised.
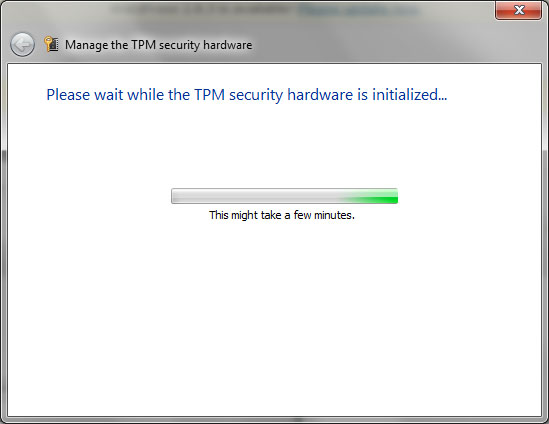
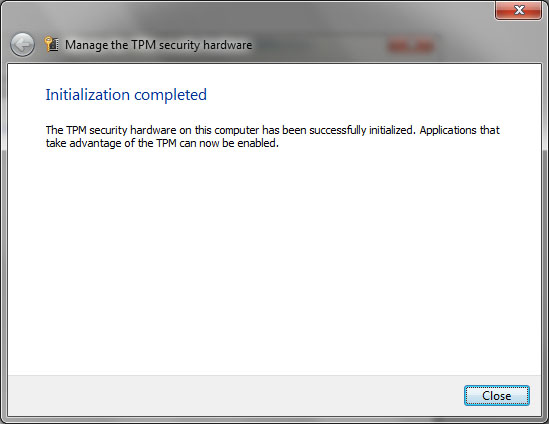
Click Close
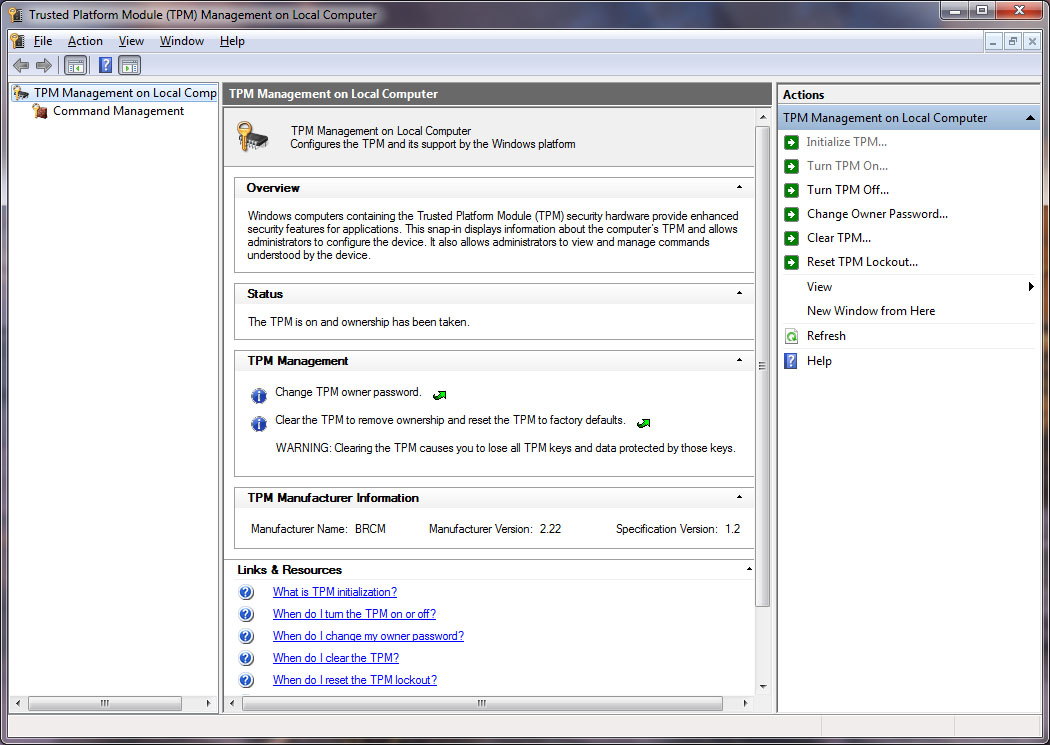
Your TPM should now be intialised and set up. You can check this by going back into the TPM management console, it should look like this now.
Hard Disk Preparation for Bitlocker
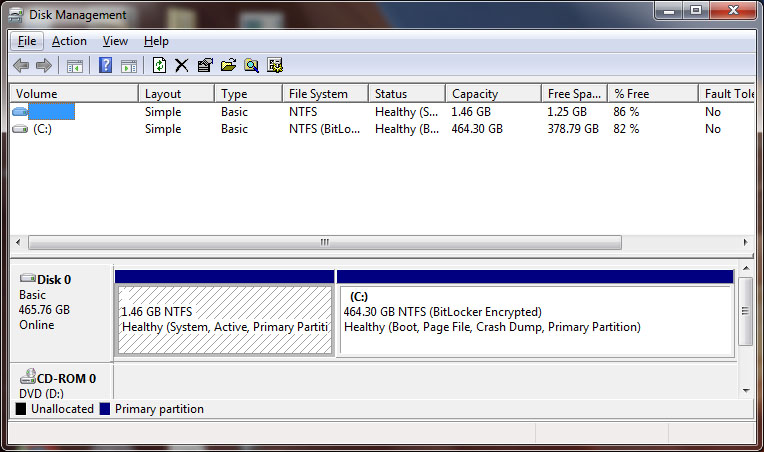
Bitlocker also requires a small partition at the start of your disk where the unencrypted boot volume resides. I created this partition manually. However, there is now a tool to do it automatically which you can download at the following link: BitLocker Drive Preparation Tool. After the drive is prepared, there should be a partitioning scheme similar to the one below. You can check this by clicking the Start button and typing diskmgmt.msc.
N.B. This snapshot was taken after encryption, so initially your partitions will will not show as “BitLocker Encrypted” as shown below – that comes later.
Setting up Bitlocker
Now it’s time to start Bitlocker. You can find it in the Control Panel under System and Security.
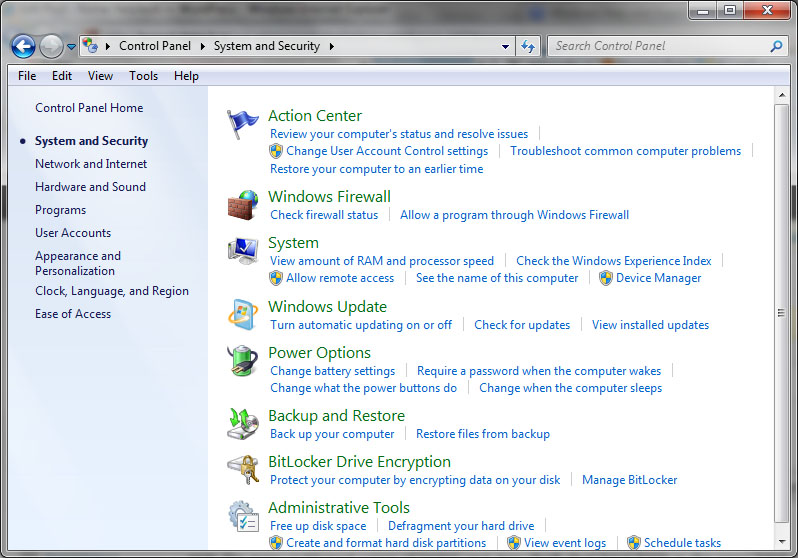
Click on Bitlocker Drive Encryption
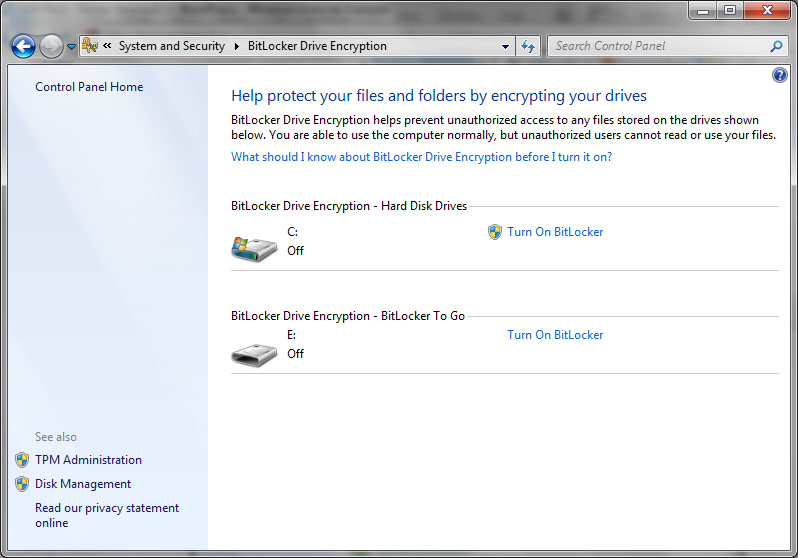
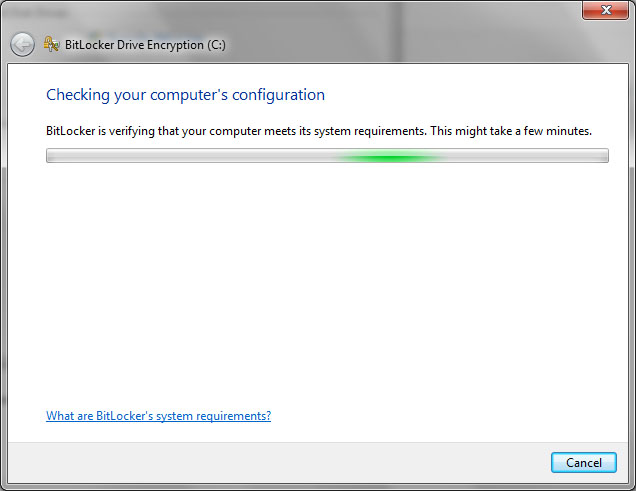
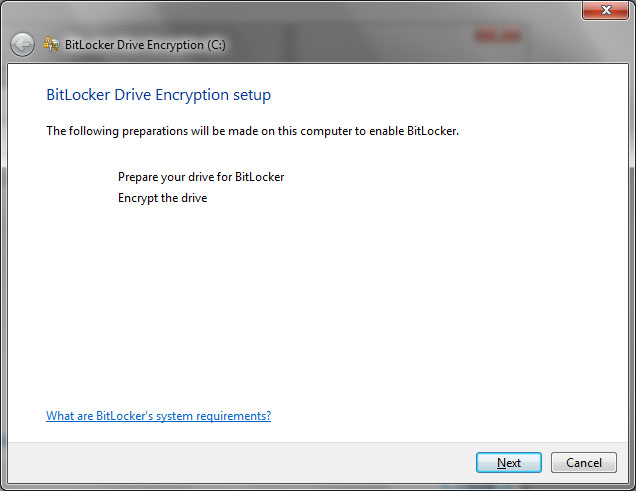
Click Next
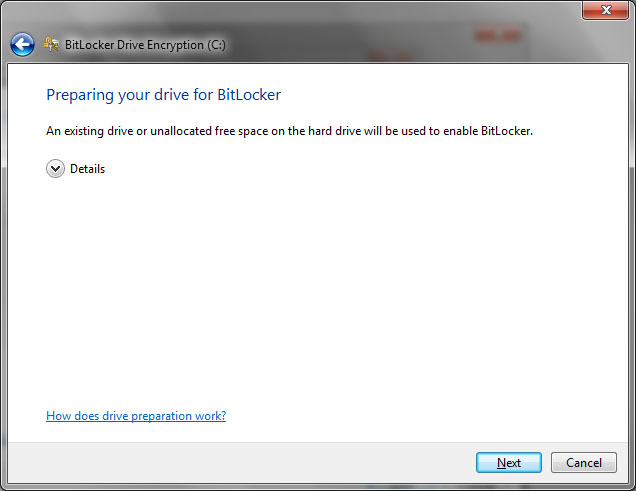
Click Next
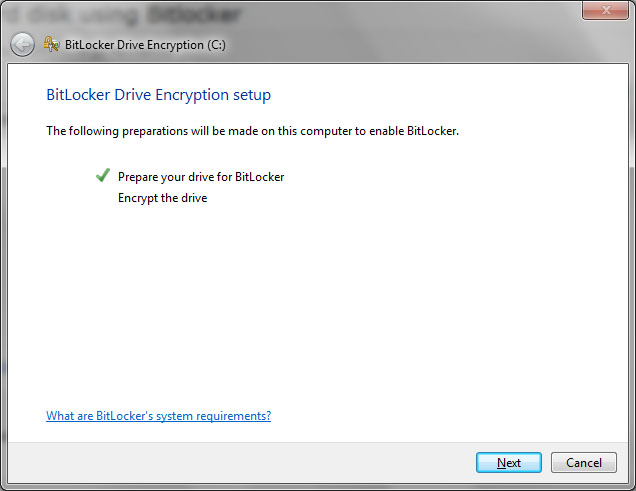
Click Next
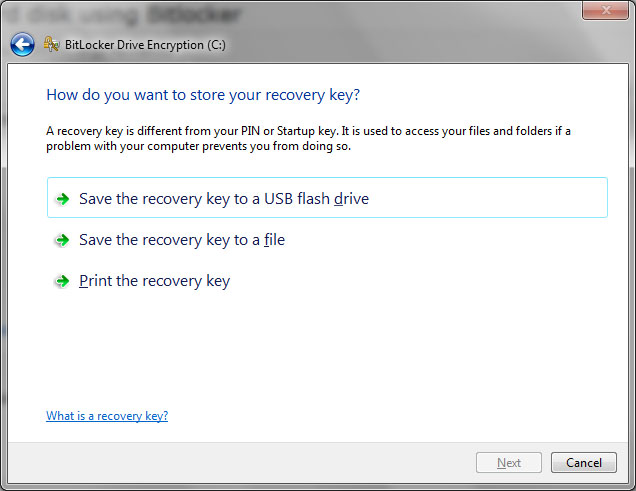
Using the same USB key as before,click on Save the Recovery key to a USB flash drive
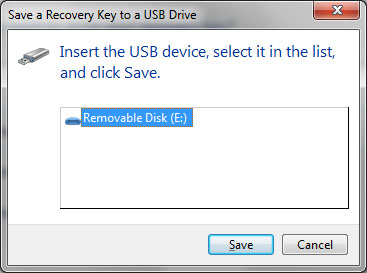
Click save and then next on the previous window.
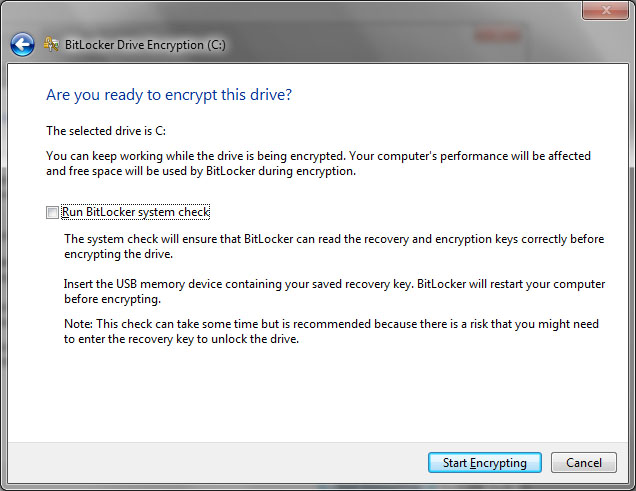
Click Run Bitlocker system check and then click Continue, which appears instead of Start Encrypting.
Click Restart Now when it appears.
The machine will reboot, will briefly show a Bitlocker message when it is restarting and will then re-enter windows. Log in as normal.
It will then start encrypting your disk.
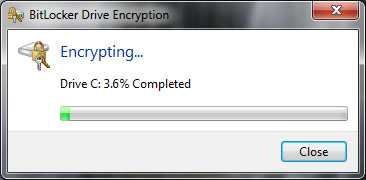
You then need to wait for the encryption to complete. In my case a relatively high spec laptop took around 6 hours to encrypt around 130GB of data. When the encryption completes, the following message is displayed.
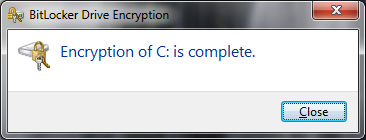
That’s it. You’re done and your data is safe from prying eyes in the future.
If you have any problems with these steps or any other problems please don’t hesitate to call one of our qualified engineers and technicians and we will be delighted to perform the required steps to deal with your problem.
| Lo-Call 1890 219 219 (Ireland) | Freefone 0808-CALHELP (UK) |
| Business Hours: Monday – Friday 9:45 to 6:30 & Saturday 9:00 to 12:00 |
- Bookmark :
- Digg
- del.icio.us
- Stumbleupon
- Redit it
Sorry, the comment form is closed at this time.


